Getting Started with Xero
Setting up Xero and Hugo Systems requires users to move between the Xero and Hugo Systems applications to configure the link. Each step details which application you should be in to complete the step.
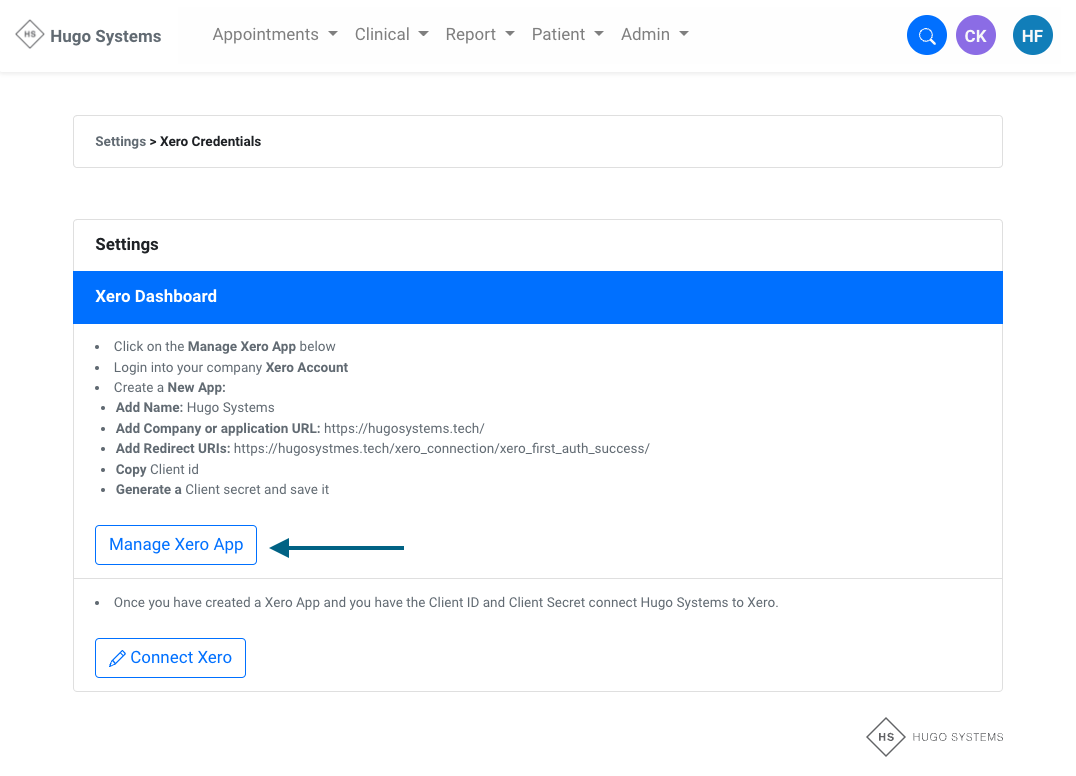
Step 1: Hugo Systems - Click Mange Xero App
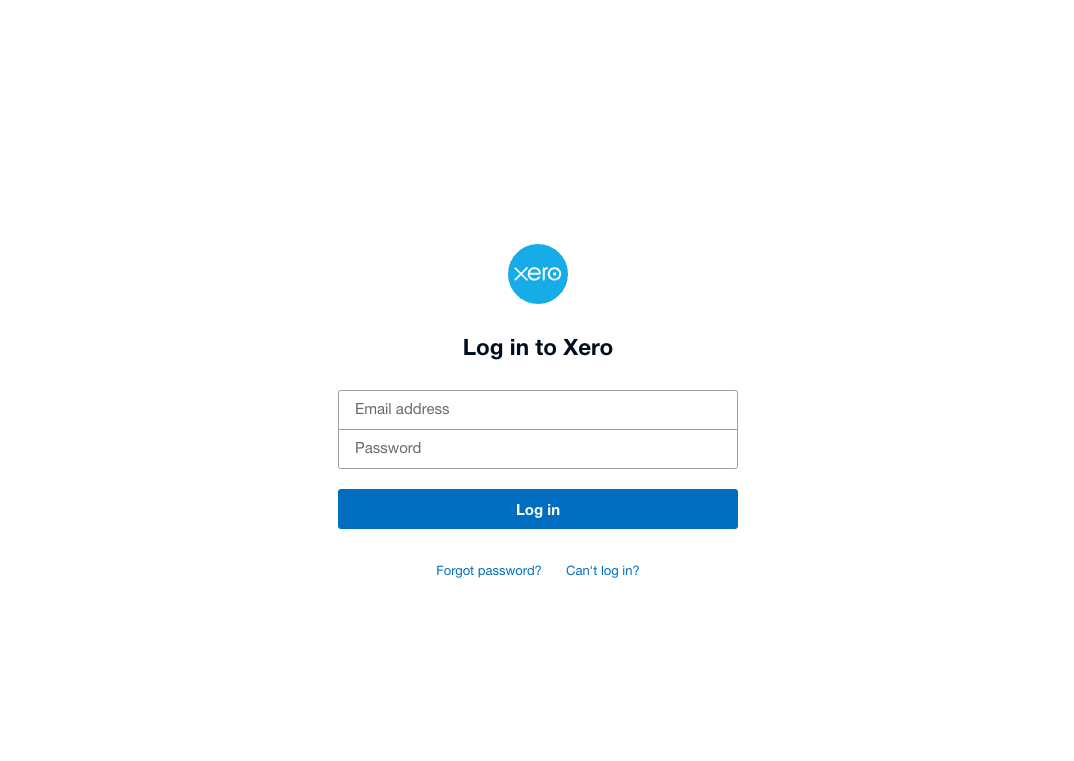
Step 2: Xero - Login to your Xero Account
- Enter your company Xero Credentials
- If you are not a Xero customer, start by setting up your Xero account
- Learn all about Xero using their excellent guides
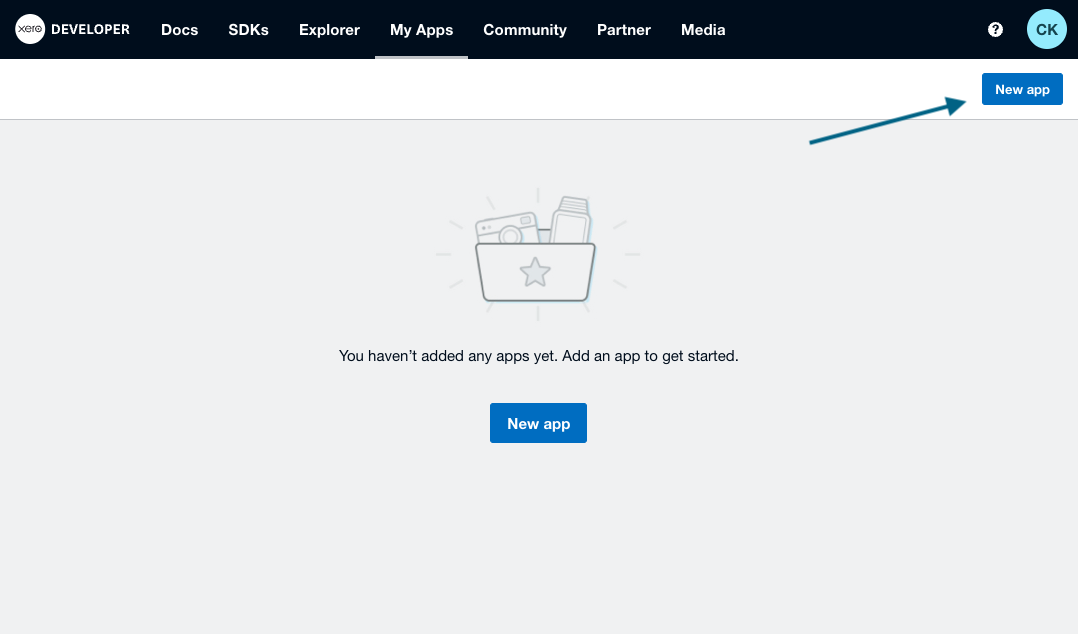
Step 3: Xero - Click New app
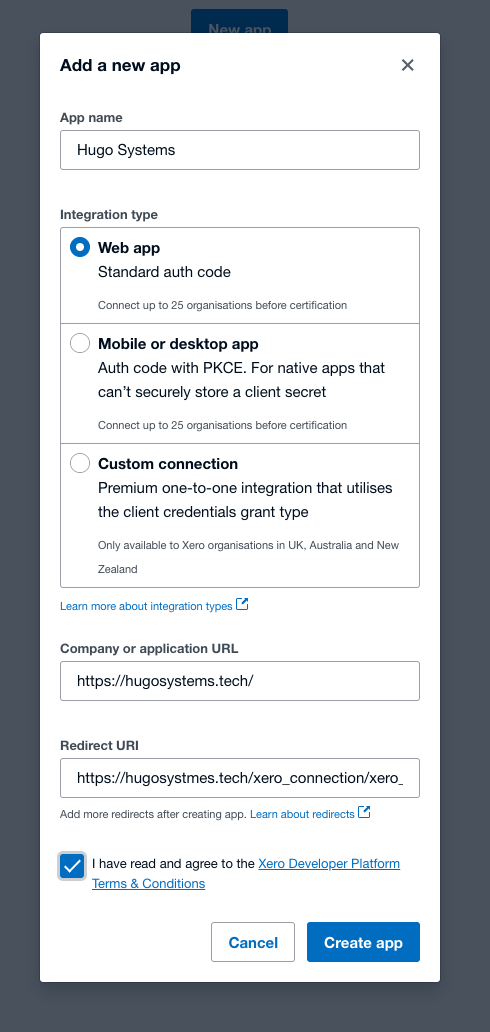
Step 4: Xero - Add a new app
- App Name: Hugo Systems
- Web app
- Company or Application URL:
https://hugosystems.tech/ - Redirect URI:
https://hugosystmes.tech/xero_connection/xero_first_auth_success/ - Accept terms and conditions
- Create app
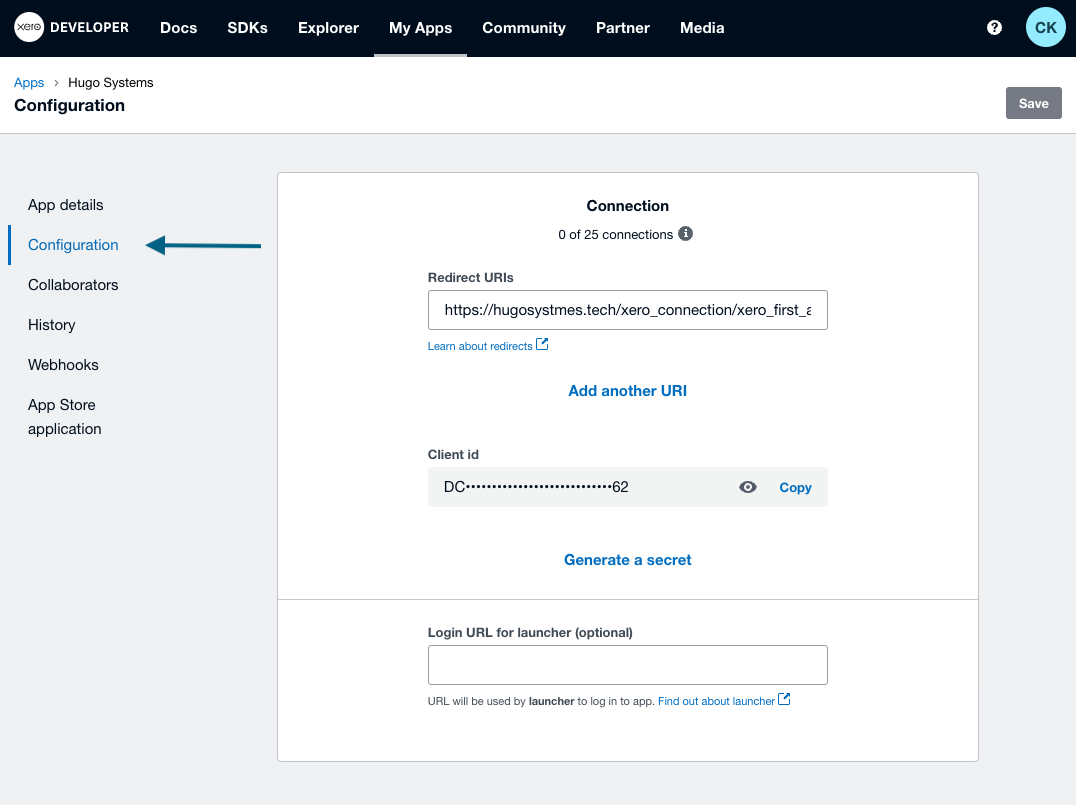
Step 5: Xero - Click Configuration on the side panel
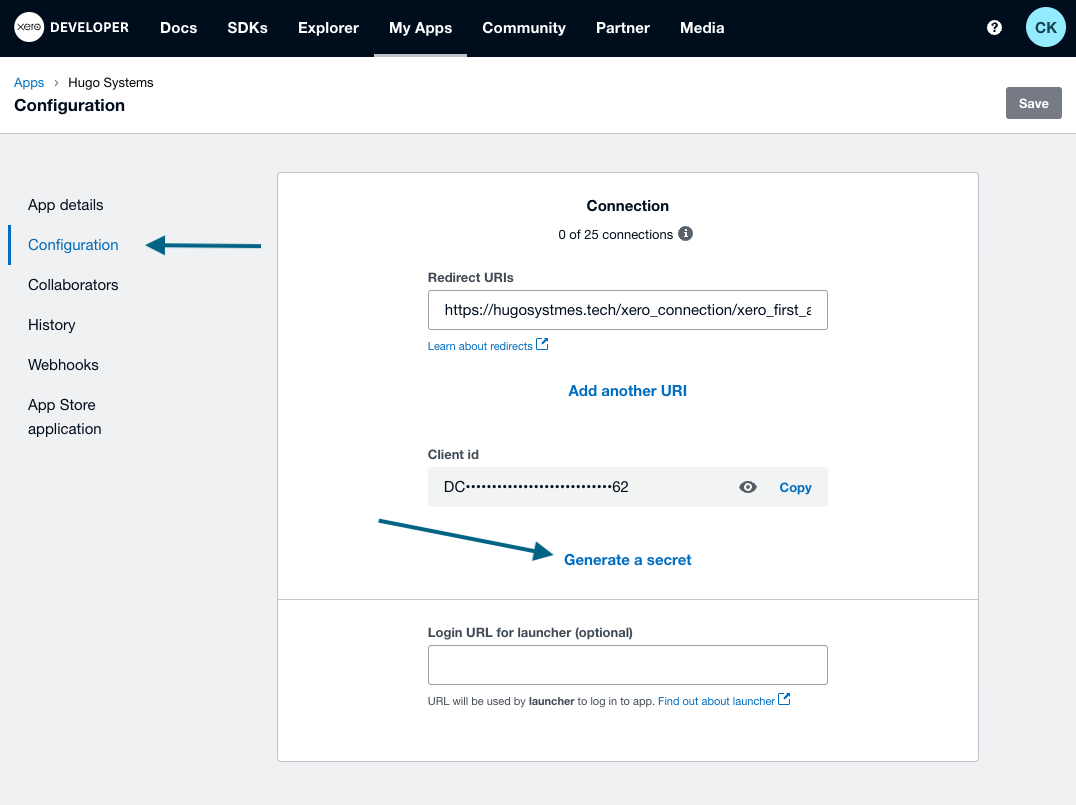
Step 6: Xero - Click Generate Secret
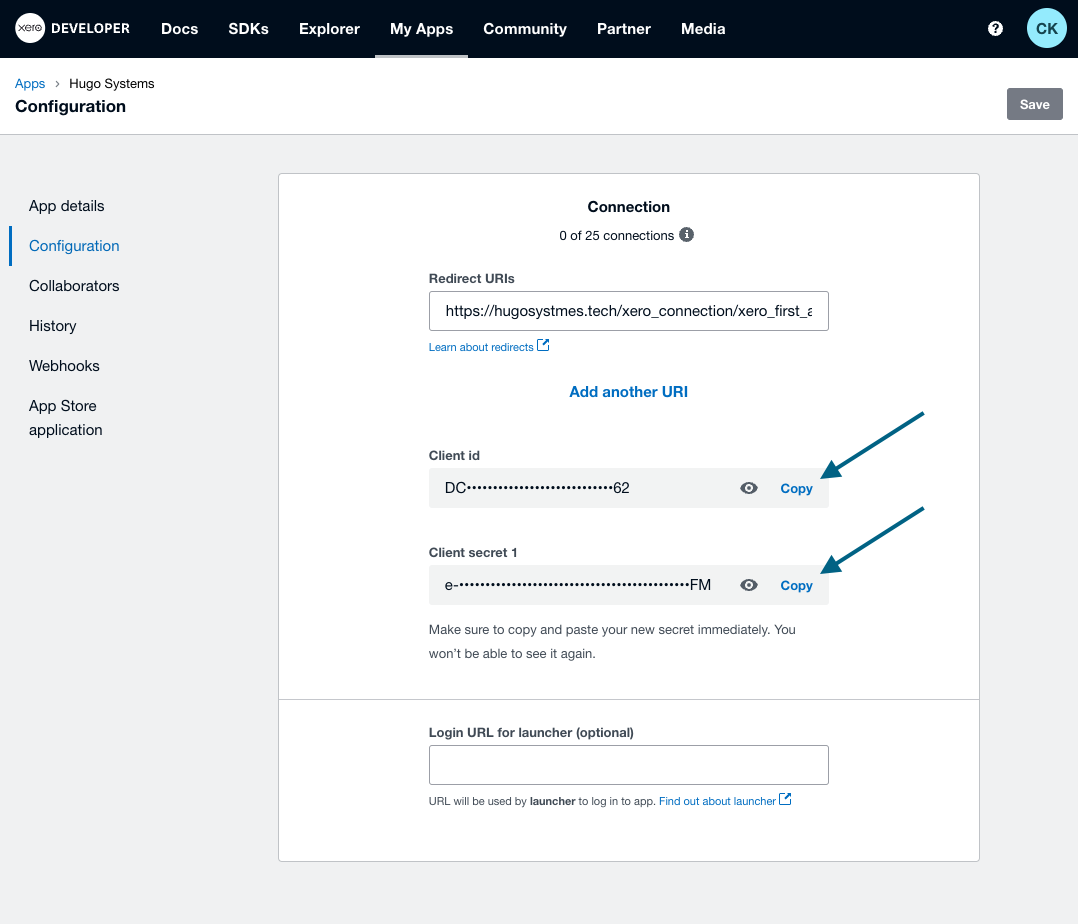
Step 6: Xero - Copy Client ID and Secret
- Copy Client ID
- Keep this safe
- Copy Secret
- Keep this safe
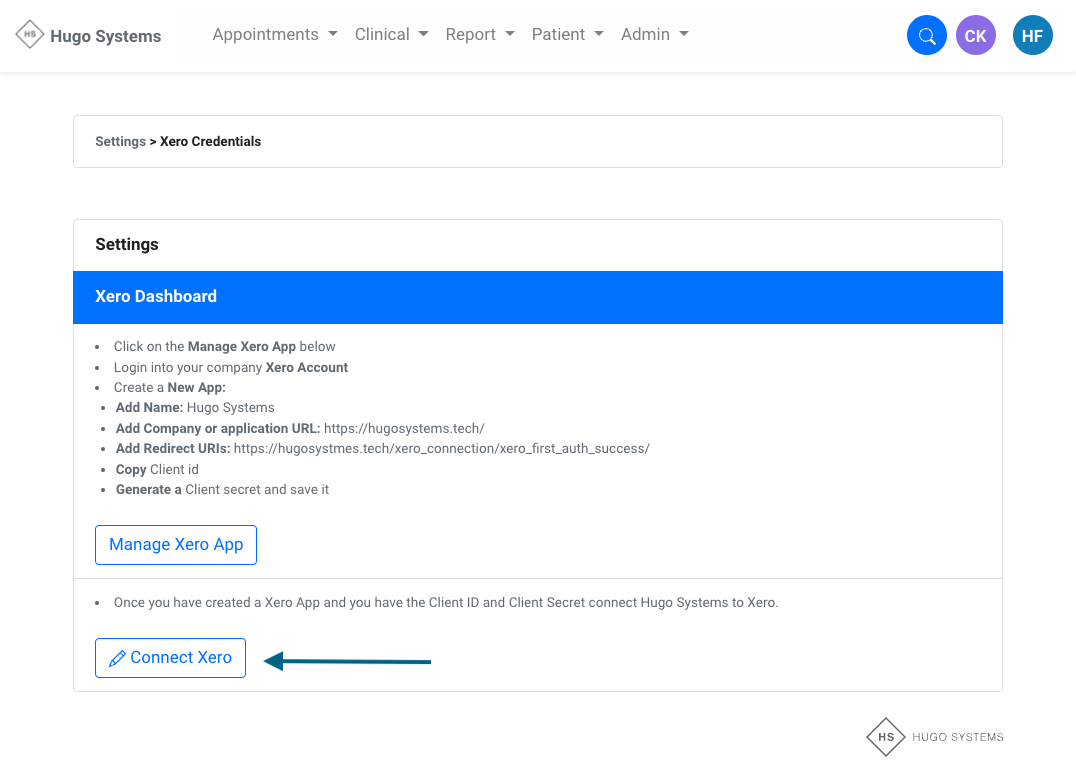
Step 7: Hugo Systems - Click Connect Xero
Step 8: Hugo Systems - Paste Xero Client ID and Secret
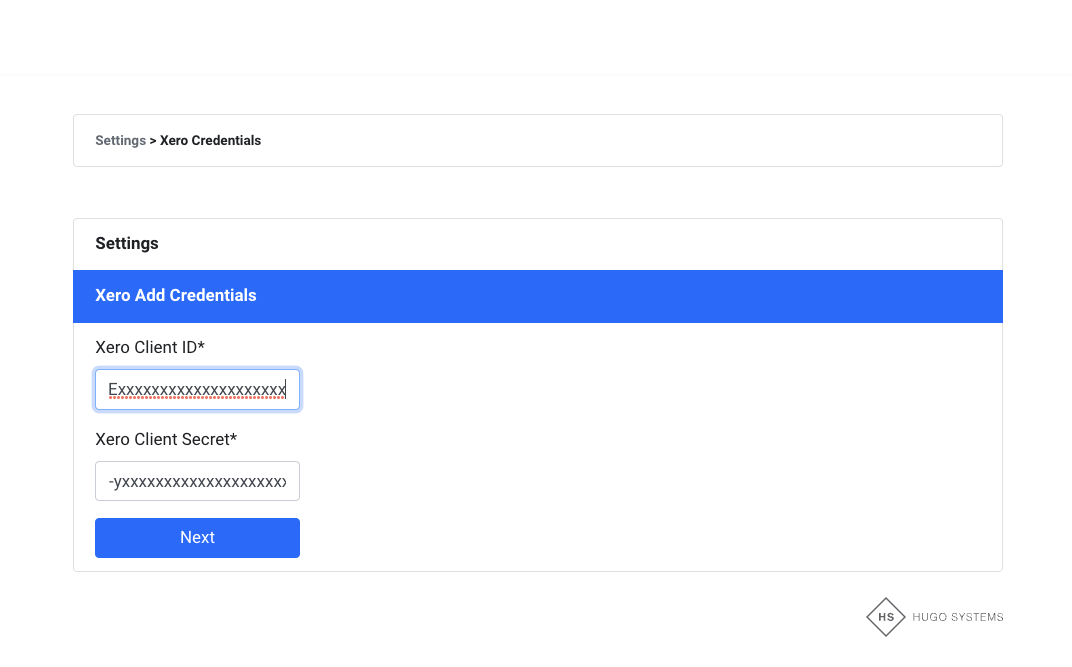
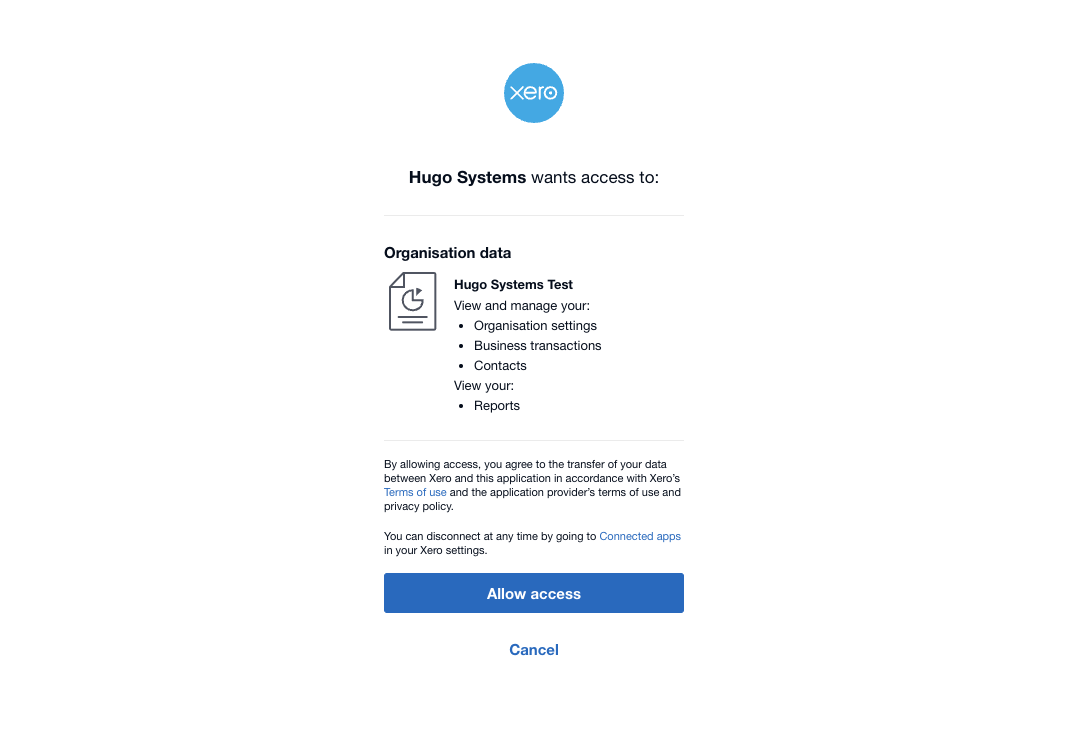
Step 9: Xero - Authenticate Hugo Systems
- Click Allow Access
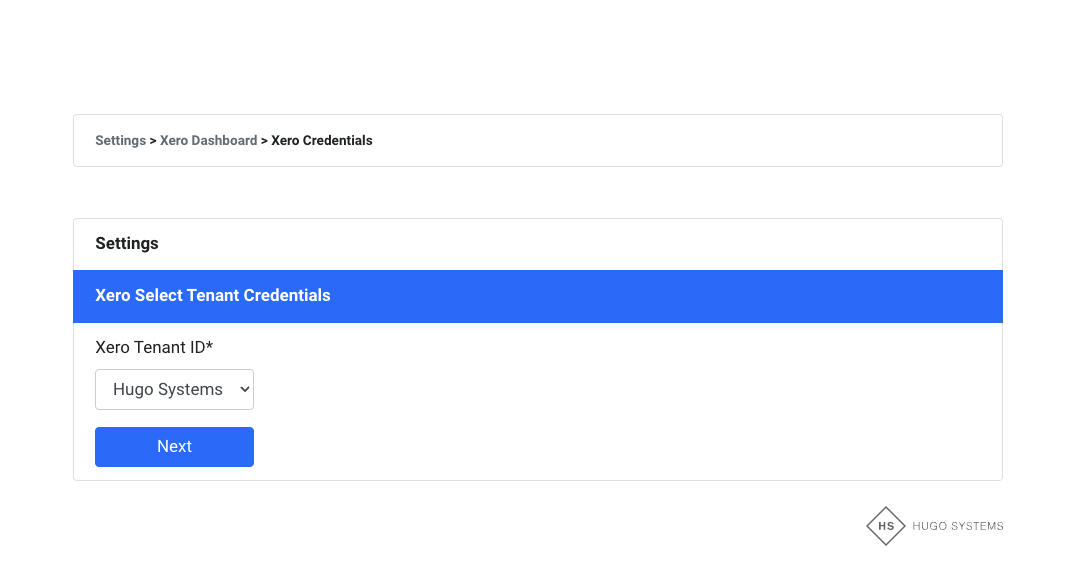
Step 10: Hugo Systems - Xero Select Tenant Credentials
- Select the App you created in Step 4
- Click Next
Step 11: Hugo Systems - Click Update Groups
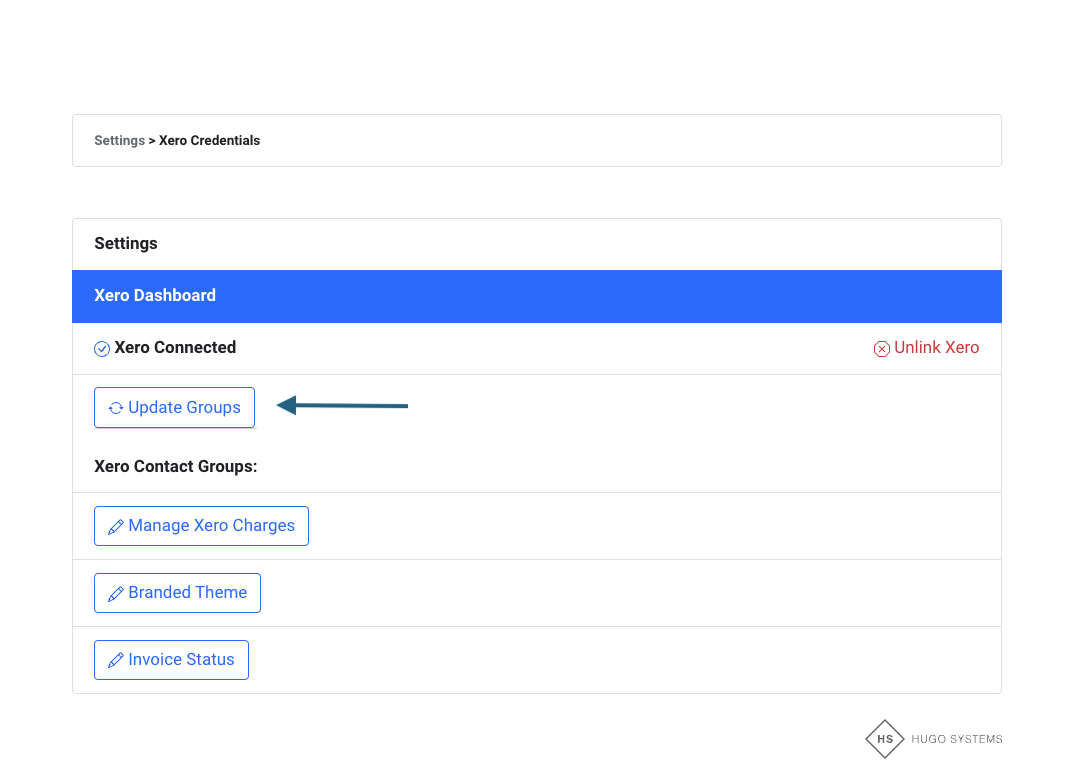
Step 12: Hugo Systems - Confirm all of your branches have been created
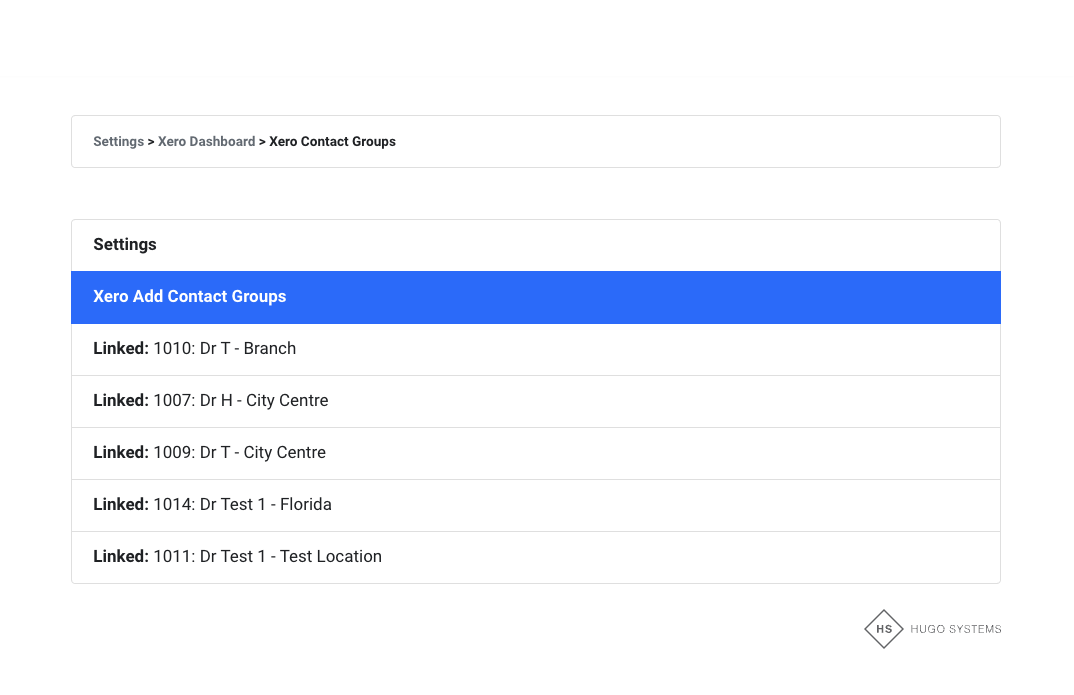
- Next setup your